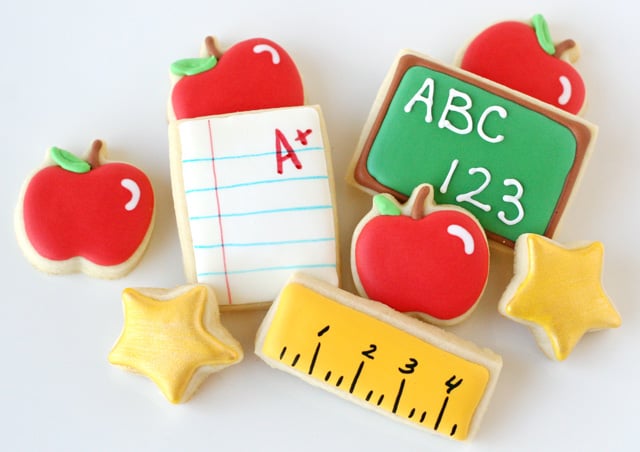
Okay, folks, gather ’round! With the kiddos heading back to the classrooms, or maybe just starting a new term, I figured it was the perfect time to whip up some “back to school” cookies. It’s become a bit of a tradition in my house, a little something to sweeten the transition.

Getting Started – The Prep Work
First things first, I raided my pantry. You know how it is, gotta make sure you have all the bits and bobs. Flour, sugar, butter – the usual suspects. I always like to get my butter out of the fridge a bit early so it softens up. Makes mixing a whole lot easier, trust me on that one. I also grabbed my trusty mixing bowls, the electric mixer (my arm isn’t what it used to be!), and a couple of baking sheets. Oh, and parchment paper! Can’t forget that, makes cleanup a breeze.
Making the Dough – The Fun Part!
Alright, so I started by creaming the softened butter with the sugar. Just let the mixer do its thing until it’s nice and fluffy. Then, in went the egg and a splash of vanilla extract. I love that smell! Once that was all combined, I gradually added the flour mixture. I usually mix the flour with a bit of baking powder and a pinch of salt in a separate bowl first. Just dump it in slowly so you don’t end up with a flour cloud in your kitchen. Been there, done that, not fun.
The dough came together pretty quickly. You want it to be soft but not too sticky. If it feels a bit too wet, a tiny sprinkle more flour usually does the trick. I then wrapped the dough in some plastic wrap and popped it in the fridge for about an hour. This step is super important, folks! Chilling the dough makes it much easier to roll out and cut, and it helps the cookies keep their shape when baking. Don’t skip it, or you might end up with sad, spread-out blobs instead of cute cookies.
Cutting and Baking – Almost There!
Once the dough was nicely chilled, I floured my countertop and rolling pin. I rolled the dough out – not too thin, not too thick. Maybe about a quarter of an inch? Then came the fun part: cutting out the shapes! I have a few cookie cutters that are kinda school-themed: an apple, a pencil, maybe a little book shape. If you don’t have specific cutters, just simple circles or squares work fine too. It’s the thought that counts, right?
I carefully placed the cut-out cookies onto my parchment-lined baking sheets. Then into the preheated oven they went. I usually bake them at around 350°F (that’s about 175°C for my friends across the pond). They don’t take long, maybe 10-12 minutes. You gotta keep an eye on them. I like mine just golden around the edges.
Cooling and Decorating – The Grand Finale!
Once they were baked, I let them sit on the baking sheet for a few minutes before transferring them to a wire rack to cool completely. Another important step! If you try to decorate warm cookies, the icing will just melt and slide right off. Disaster!
Now for the decorating! This is where you can get really creative. I whipped up a simple royal icing – just powdered sugar, a tiny bit of water or milk, and a splash of vanilla. For the “back to school” theme, I used some food coloring to make red for the apples, yellow for the pencils, you get the idea.

- Red icing for the apples, maybe a little green leaf.
- Yellow for the main part of the pencil, then some pink for the eraser bit, and a dab of black or grey for the lead.
- For book shapes, maybe a white base and then you can draw little lines with a darker color.
It doesn’t have to be perfect. Mine certainly aren’t professional-looking, but they’re made with love! Sometimes I use sprinkles, sometimes I just keep it simple with the icing. The kids (or grandkids, in my case now!) love them either way.
And there you have it! My little adventure in making back to school cookies. They turned out pretty good, if I do say so myself. A nice little treat to mark the occasion. It’s these little things, these traditions, that make memories, isn’t it? Happy baking, everyone!


