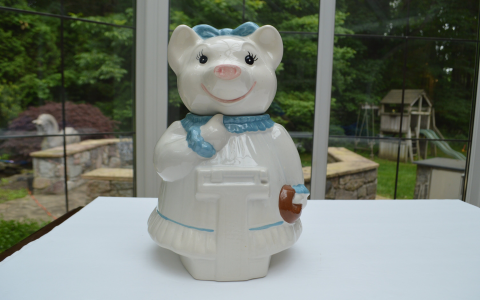
So, I got my hands on this absolutely charming vintage pig cookie jar a little while back. It wasn’t a fancy antique store find or anything, actually stumbled upon it at a local garage sale, buried under a pile of old tablecloths. Looked a bit rough around the edges, I gotta say, but something about its goofy smile just called to me. Knew I had to bring it home.

Figuring Out the First Steps
First thing I did when I got it back to my place was just sit and look at it for a good while. It was definitely old, probably seen a fair few cookies in its day. Covered in a layer of grime that looked like it had been there since the dawn of time. My main goal was to clean it up without ruining its vintage vibe, you know? Didn’t want to make it look brand new, ‘cause that’s not the point.
So, I started gentle. Grabbed a super soft cloth and some lukewarm water. Didn’t even think about using harsh soaps at first. Just wanted to see what would come off with a bit of gentle persuasion. A surprising amount of dirt lifted, which was pretty satisfying, not gonna lie. But there were some stubborn spots, especially in the little crevices, like around its ears and that cute curly tail.
Getting Down to the Nitty-Gritty
Okay, for those tougher bits, I decided to step it up a notch, but just a tiny one. I used an old, soft toothbrush and a teeny-tiny drop of mild dish soap in some warm water. I’m talking a really small amount of soap. Then I just went at those crevices, super gently, circular motions, you know the drill. Took a bit of patience, I tell ya. Some of the paint looked a little delicate, and the last thing I wanted was to flake any of it off. I was probably hunched over this pig for a good hour, just carefully cleaning. My back was not thanking me later!
There was this one spot on its back, looked like an old sticker residue or something. That was a real pain. I tried a bit of oil on a cotton swab, letting it sit for a few minutes, then gently rubbing. Had to repeat that a couple of times before it finally gave up the ghost. I was so relieved when that came off without damaging the paint underneath. Always a bit of a gamble with old painted stuff.
Once all the cleaning was done, I rinsed it carefully with clean water and then patted it dry with another soft cloth. Then I let it air dry completely for a whole day, just to be sure no moisture was trapped anywhere.
The Final Look and What I Think
And wow, what a difference! It wasn’t like a magical transformation into a brand-new cookie jar, and I’m glad for that. It still looks beautifully vintage, with all its history intact. But now it’s clean, the colors are a bit brighter, and it just looks… happy. You can really see the craftsmanship that went into it back in the day.
Here’s basically what I did, step-by-step:

- Found the pig (the best part!).
- Initial gentle wipe-down.
- Careful scrubbing with a soft brush and mild soap for stubborn dirt.
- Tackled that annoying sticker residue with oil.
- Rinsed and dried it super carefully.
This vintage pig cookie jar is now proudly sitting on a shelf in my kitchen. It’s not actually holding cookies right now – trying to cut back, you know? But it’s a great conversation piece, and it just makes me smile. It’s amazing what a bit of cleaning and care can do. Didn’t really think it would turn out this nice when I first picked it up, all dusty and forgotten. Just goes to show, sometimes the best finds are the ones that need a little bit of love to shine again.


